January 25, 2011

PTI Blog Hop!

The post that almost wasn't!!  I'm having technical difficulties, when, of course, I FINALLY have a blog hop project to share!  eesh.  Luckily, I had a backup plan...

The challenge this month is to show some love to some neglected PTI stamps.  ALL of my stamps have been neglected lately, so this wasn't a very hard challenge, lol.

What I did here...is created some fun felt hair clips for my daughter's friend, and decided to incorporate them into her birthday card.  I die cut the star shapes out of PTI Chocolate and Raspberry felt, then I attached the two bitty dot Hawaiian Shores 'tails' to the star with a little scor tape, to hold them in place, while I sewed the star layers together and onto to the alligator clip that was wrapped with Hawaiian Shores twill.  Cute, right?

I used the Outlines Alphabet to create a background for the Raspberry layer.  Now -- I see some of the 8's are kind of 'glowing' in my photos...creepy, yes.  But I can assure you, this is not how the card looks to the naked eye!  After stamping my background, I used my Fillable Frames #3 die and stamp set to stamp my sentiment on (which is from Birthday Bash Sentiments).  Behind it, are 3 strips of rickrack, cut with the rickrack die.  They are adhered to the card front at the top, middle, and bottom.  This allows me to clip the clips onto the card, incorporating them into the design!

I loved the way this came out, and honestly, while DD was excited to give this to her friend, I could see she wanted to keep it for herself, lol.

Thanks for popping by!!  Make it a GREAT day! :)

Supplies:
Stamps: Outlines Alphabet, Birthday Bash Sentiments, Fillable Frames #3
Ink: Hawaiian Shores, Raspberry Fizz, Brilliance Chocolate
Paper: Hawaiian Shores, Raspberry Fizz, Select White, Dark Chocolate
Accessories: Raspberry & Chocolate Felt, rickrack die, Fillable Frames #3 die, Hawaiian Shores bitty dot & twill ribbon, Hawaiian shores buttons, chocolate DMC floss, alligator clips, star nestabilities


January 7, 2011

Hi there...

Remember me??


It's been awhile, and while I haven't actually MADE anything in over a month...I have a few projects that I've never posted, so I thought I'd share one with you all today.  I had made this for a Papercrafts sketch challenge a few months back.


It uses my FAVORITE color, Orange Zest.  These pretty little roses are from Prima, the sentiment from Papertrey Ink's Out on A Limb Sentiments.

While I haven't been online much - I've been plenty busy...makes me wonder how I had time to do everything I was before too! lol.  The holidays here were great, no stress.  I enjoyed a week off with my girls, and it was heaven.

The New Year so far, has been a good one, and I hope that it continues on this trend...*fingers crossed*  I'm truly blessed!!

Thanks to those of you that have popped in!!  Wishing you all a WONDERFUL day!!

December 14, 2010

You know...

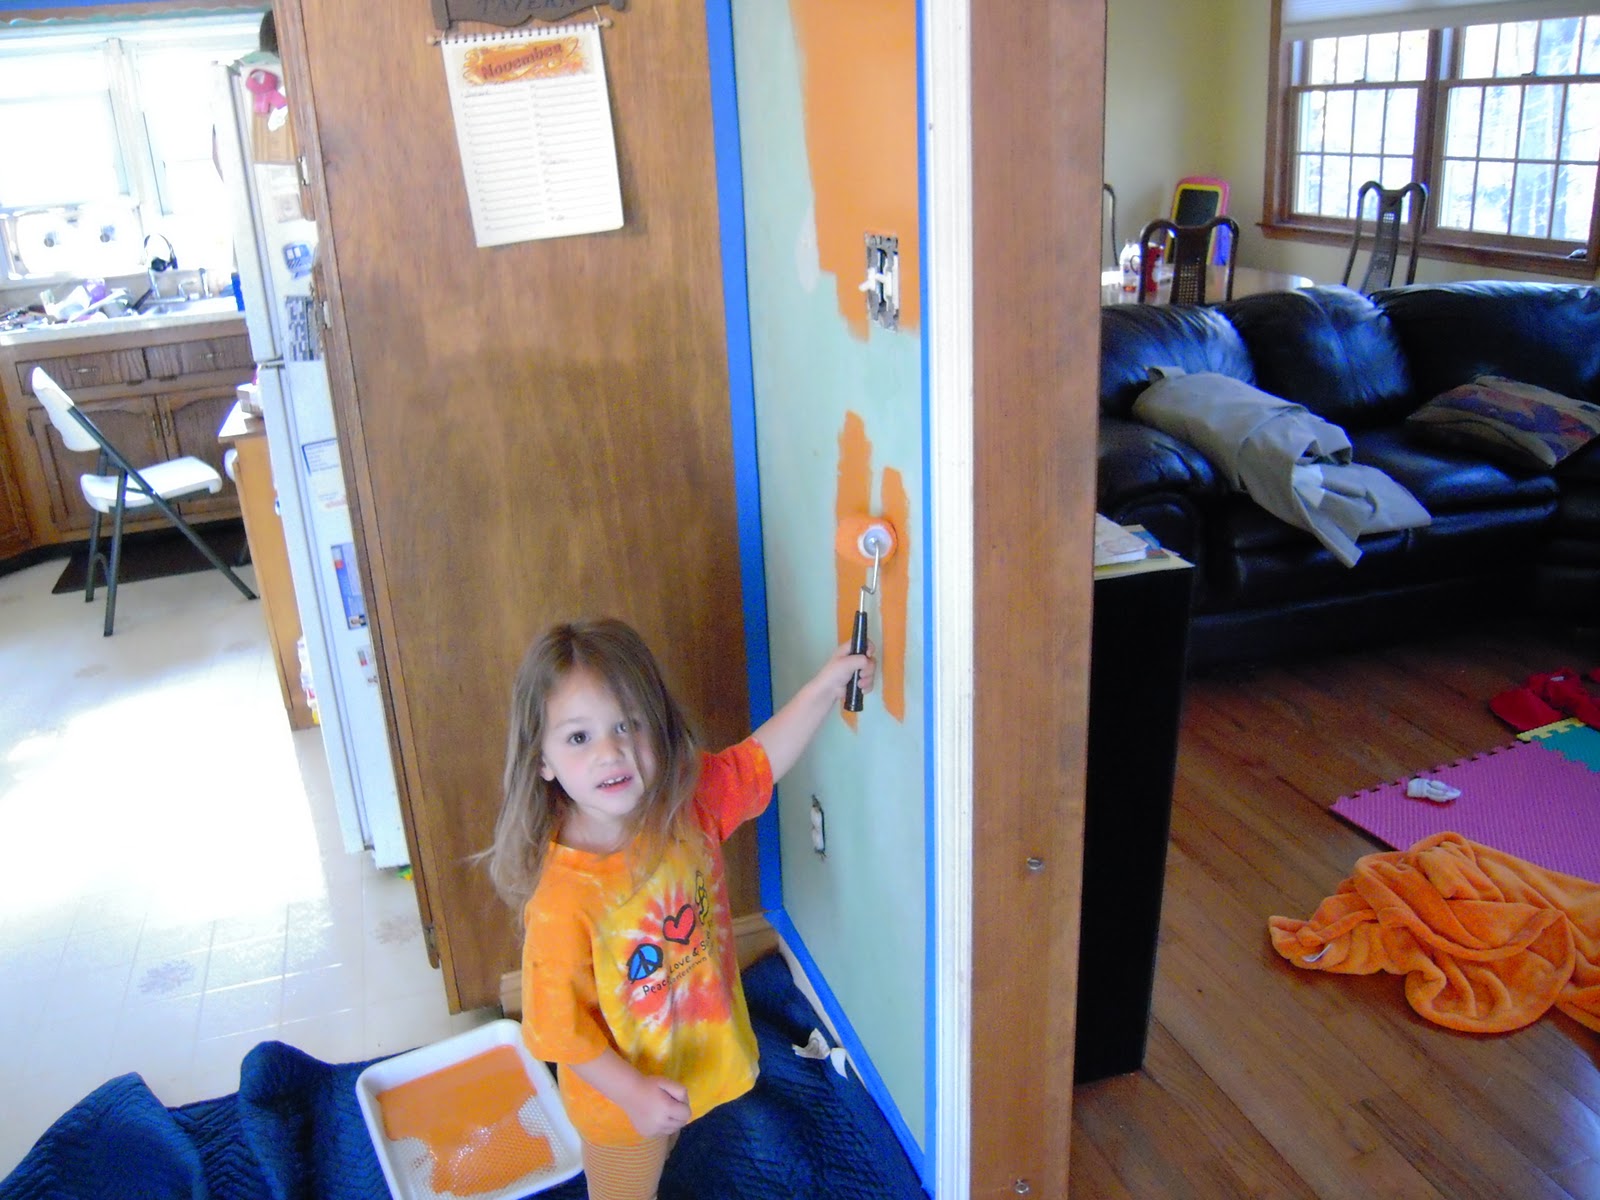
I never quite realized just how big my kitchen floor was...until we recently painted our kitchen, and I got on my hands and knees and scrubbed the entire thing with a handy-dandy scrub brush.  I have one of those Hoover hard floor cleaners...well, let me tell you -- those things apparently DON'T work very well.  When I saw all of the dirt and nastiness that I got off of my floor by scrubbing, eeeeek.  I was embarrassed that I've been using that thing for so long!!!

Anyway -- I'm quite happy with how the kitchen turned out.  We've been talking about painting it for over 2 years, and we FINALLY did it.  When we first started talking about painting, I had bought new bulbs and shades for my chandelier in the dining area, and I said "That way when we paint, it will look fresh and new".  Well, one by one the bulbs started to blow, and I kept saying "Nope, not going to change them until we paint - then I'll change them all at once"...by mid-November, we were down to 2 bulbs...it was getting hard to see dinner, lol.

We had volunteered to host Thanksgiving dinner, so between that and the nearly non-existent light to eat by, we decided to FINALLY paint.


Here it is, all finished, and looking pretty :)

This is the dining area end:


and the kitchen end:

Now, I'm most excited about this -- I have plate covers on all of my switches...you know that saying "the shoe makers children have no shoes"?  Well, my hubby is an electrician, and since we had been talking about painting the kitchen (following a Family room addition onto our house, that partly involved the kitchen), he never put plate covers on all of our switches in the kitchen...SOOOO, now the room is complete, and looks so nice!  Check out these fancy schmancy switches:

Since we had a little more than 2 years to prepare for this momentous occasion, hubby sprang for these super duper programmable dimmers, buying them here and there, until we had enough switches for the kitchen. (about 8 or 9 all together)

Thanks for taking a tour of my home improvement project with me!! :)

Hope all is well with you all -- have you got your Christmas shopping done yet???  I'm about 90% there, YEAH!!! :)

December 1, 2010

It's a WRAP!

Happy December!!!

Today, the My Time Made Easy team is sharing a GREAT new template that is available for purchase RIGHT NOW over at My Time Made Easy, called Wonderfully Wrapped.  Let me tell you -- this is a FUN template.  It's SUPER easy to put together -- with a more sophisticated look.

Here's mine:
I was feeling a bit nostalgic, as today is my last post with the team at MTME.  Those of you that follow me, have noticed I haven't been around much.  In fact, my last post was the last MTME release!  I think I need to take a step back for a while, focus on my family, and my home...and you never know, you may just see me pop back up out of nowhere...but for now, this is what I need to do.

BUT -- back to my nostalgia ;).  I decided to go back to the VERY FIRST digital papers offered last year, the "12 Days of Snowflakes", and as usual, I felt the need to tweak the colors, because I've had this pretty ribbon FOR-EV-ER, and never had a good paper that matched it, that's the beauty of digital paper, and a little photoshop know-how.  Here's the side view:
I kept it very simple, creating a large ornament out of some silver glitter paper using my Marvy Mega Circle punch, and hand cutting the ornament 'topper'.  I used the frame and a sentiment from So Sentimental, and affixed it to the front. Done!

Simple, elegant, EASY, just the way it should be.

I'd like to take a quick moment to thank my fellow teammates for all of their support, laughs, and shared late nights over the last year... they are ALL an amazing group of women, and I'm BLESSED that our lives have crossed.

I'd really like to thank Lauren, for giving me this amazing opportunity.  She is such a delight to work with, and her creativity inspires me daily.  I love to see her business grow and flourish, she deserves it.

And of course, I'd like to thank ALL OF YOU...for stopping by, and leaving a word or two, or for just stopping by, and perhaps sharing a smile :O).

I wish you all the happiest of holidays, may they bring you joy that lasts all the new year through!!

Now, hop on to the rest of the team's blogs, they've ALL got something marvelous to share with you today!!


November 5, 2010

Any Way You Slice It - Group Post!!

When we last left off -- we were dealing with bugs...well, I think it was a false alarm...I never did find anything, and when she went back to school, the nurse checked her and didn't find anything either... *sigh*  That's ok though...now we've moved on to other bugs...same daughter, different issue.  So, she was out of school on Tuesday because of 'lice'.  Then she went to school Wednesday, and when I got there to pick her up, she was running a temp of 101!  My poor girl :(.  So, we were home again today, doing lots of snuggling (which *I* certainly don't mind ;) ).  She seems to be feeling better this evening though, so I think it will be back to work/school tomorrow...

I hope you've been enjoying the release at My Time Made Easy this month!!  Today is a group post, and I'm featuring a great little template called 'Any Way You Slice It'... Yep, it could be cake, or pie, or a reindeer, or a flag, or...well, goodness...it could be a lot of things, ha ha ha.  I chose to make a cute little Secret Santa gift box, that looks like a Santa hat (which I'm a bit embarrassed, because as I went to link the stamp set, I realized I made a similar template to Lauren *blush*) but here's my version...
The template features images from Secret Santa and Fanciful Flourishes.  It's VERY sparkly :)  I used heat and stick powder and lots of red and silver glitter.  Here's a closer view of the side:
The bottom of the box is lined with white maribou fur.  Totally fun.  I sometimes like to give fun ornaments like the one in the background as secret santa gifts, and an ornament, or a gift card with some chocolate will fit nicely inside this box for sure!!
My tag features images from Secret Santa, and has a bit of sparkle added here too.  The hat was stamped on a separate piece of CS, colored in and cut - and mounted on the tag with a dimensional.  

What kinds of things do YOU give for secret Santa gifts...inquiring minds want to know!! lol.

Be sure to drop by the rest of the team's blogs, as we've each got something to share with you today!!!

My Time Made Easy Design Team:
Tracey Cuccia - that's me :)


November 2, 2010

My Time Made Easy - Star of the Show!!

I'm a little late posting... we have some new unwanted guests...yeah, I think there's still mice downstairs...but even worse...we've got lice.  There.  I said it.  Well, I guess I shouldn't say "we"...but apparently it's running rampant in the Elementary school, and there was a case at my young daughter's preschool...and well, it seems the little one had an egg or two in her hair today...ugh.  SO, I've spent the evening doing a lice treatment in her hair (even though we didn't find any lice, the school found 2 eggs...that's enough for me!  I've also checked my older one, and my husband, he checked me...I went to the laundrymat and washed ALL of our bedding (can you tell I'm just a BIT freaked out?? lol) okay.  Sorry.  (You're all scratching your heads now though, aren't you????)

Moving on!!  Today's post is all about Star of the Show - a KILLER new template from My Time Made Easy.  I LOVE this template.  This is a simple assembly, and such a versatile shape -- think 4th of July, or Christmas, Birthdays, Sports...YEP, lots of possibilities here!!!

Here's what I've got for you today...

This uses some oldies but goodies in the MTME arsenal.  Lunch Box Love Notes, and the Alphabet Soup Collection 2 pretty printables paper.  I had my older daughter in mind with this.  She's in first grade, and has had a HARD time this year.  She's really smart, and funny, sweet, and kind...most of all, she is SENSITIVE, and this year, she's had a REALLY hard time adjusting to her new teacher.  Like, anxious tummy hard.  I've gone through a HUGE range of emotions, from angry, to sad, to almost insane, lol.  I've been fighting with the school to have them meet her needs -- as she wasn't being challenged enough academically.  Although I REALLY wanted them to move her to another classroom, they asked me to give them a few weeks to try some new things in the classroom, and I agreed.  Whatever they did -- it seems to have worked.  Mind you, I'll be keeping a CAREFUL eye on what's going on, and if I start to recognize the same signs I had before, but, no more anxious tummy at the mere mention of school, no more "I hate school" (which I think is an unacceptable term, ESPECIALLY from a 6 year old!  I'm SO proud of her for still getting up and going to school, not giving us a hard time about going, when she was so miserable for so long...I too, am happy that my fight has changed things for the WHOLE class, not  just my daughter.  So, I'll keep this little box aside, for some day when she needs a little pick me up, she really is an amazing little girl, I'm so lucky to be her Mommy. :)

Be sure to stop in with LaurenLisa, and Catherine!!  Thanks for dropping by --- (Have you stopped scratching yet??) Make it a great day!!

November 1, 2010

Group Post!! My Time Made Easy November Release!

Well, we had a great time celebrating my Dad's birthday the other day - and he very much enjoyed his gift.  Yesterday was PACKED, I had to work (unusual for me, I typically work Mon-Fri) and then came home to take the kiddos Trick or Treating, and did we WALK.  It was great, though a bit chilly, and we all had a wonderful time.

BUT -- I know you aren't all here to listen to me ramble on about my weekend...it's release day at My Time Made Easy, and there's lots of Christmas Spirit already in the air, and all around.  I swear the stored start earlier and earlier every year, don't you??  Well, now that Halloween is over, you know that Thanksgiving will be here, lickety split, and then on to "The Most Wonderful Time of the Year" :).

The team is sharing some fabulous card ideas today, ones that are easy to replicate...and here are mine:

Each of these took me very little time to complete, most are one layer, or almost just one layer ;).  I don't know about you, but I'm sure that most of the people I send cards to don't keep them.  *sniff*  While it makes me sad, it's just a matter of reality...so I try to make cards that look nice, but don't take forever to complete.
This first one uses the snowflakes and a sentiment from Dashing Through the Snow...add a little bling, a pop of red (kind of reminiscent of a snowman's scarf, I think) and some snow drifts along the bottom...some glitter...and there's one card!!
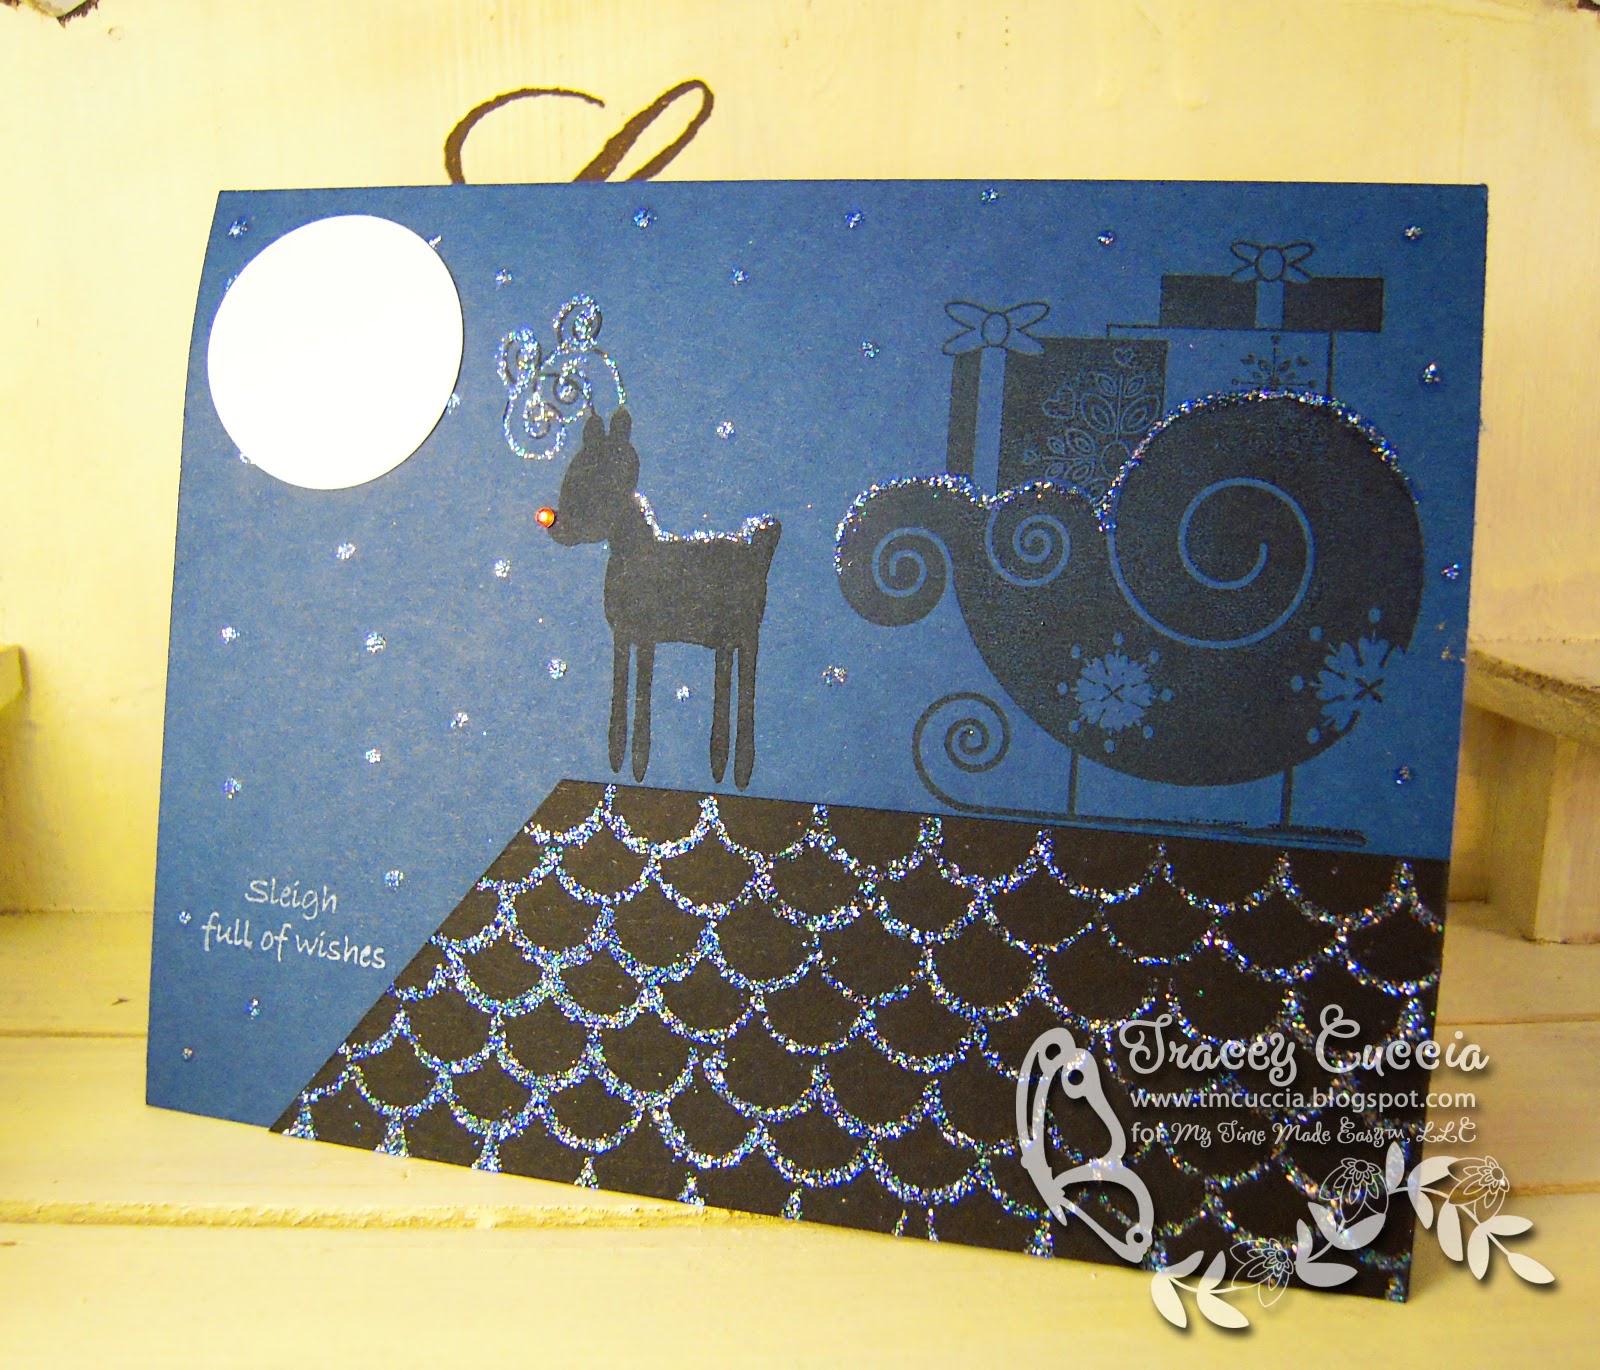
Now this next one is probably my favorite...When I saw the reindeer and sleigh images from Dashing Through the Snow, I thought of a silhouette image..."♪Up on the Rooftop, reindeer pause♪" ha ha ha.  the moon is shining bright...and so is Rudolph's nose... I used the roof pattern from Sugar and Spice, and glittered it up with some heat & stick, and dazzling diamonds glitter.
Next up -- "♪Jingle Bells♪"
Catherine did a great job with these images in Secret Santa, this bell and bow is too sweet!  I embossed both and the sentiment in gold detail powder, doing the bell first, and then the bow, and colored in the bow with my Signo white gel pen.  I added a gold border with a paint pen (that started to give out on me on the last line :( )


Lastly - my little gingerbread family...how cute are they?!?!?!  These cuties are from The Gingersnaps!  This is a small set, PACKED with images!!  You will need a craft knife to separate some of them there are so many! I made my family, me, hubster, and the 2 girls...cute, eh?  SO quick too -- the longest part was adding the black bead eyes, and the bling bows and buttons.

So, if you've never made your holiday cards, I hope these inspire you to make your own this year, and if you're a seasoned holiday card maker -- I hope this helps get those juices flowing... 'Tis the season!! :)

Thanks for dropping by, be sure to stop by the rest of the team's blogs, we've ALL got something to share today!!!

My Time Made Easy Design Team:
Tracey Cuccia - that's me :)